form内の入力項目数の残りを取得して、ユーザーにあとどれくらいで終わるのかを伝えたい
form内の入力項目数の残りを取得して、ユーザーにあとどれくらいで終わるのかを伝えたいときに、
20/30 あと10件
というメッセージを出そうと思う
このとき、ページ内の項目数をどのようにして、取得するかが、問題になる。 手動で、ひとつふたつと数えても良いのだけど、項目数が多いと、正確に数えるのが難しい。
自動的に算出する方法を考えてみる。
form内に存在する、ユーザーにとって、入力可能な項目とは何か?
formなので、input, texarea, select のいずれかとする。
とすると、対象となる、要素を取得するにはinput type= hidden と 見えない要素を除いてあげて、nameの重複を排除すれば、数は出せそうだ。
[...new Set(Array.from(document.querySelectorAll("select,radio,input:not([type='hidden'])")).map((e) =>{return JSON.stringify({name: e.name, hidden: e.clientHeight === 0})}))].map(v => JSON.parse(v)
ただ、select,radio,inputがe.clientHeight=0であるが、 JSを使って値をセットする場合は、見えないからといって、カウントしないわけにもいかない。
Firestore オフライン時のセキュリティルール
オフラインのときは、セキュリティルールは効かない。
firebase-functions-testのテストが通らない時
事象
Cloud Firestore セキュリティ ルールをfirebase-functions-testの unit testを jestで走らせようとしたら Cannot use import statement outside a module というエラーがでた。
 FAIL  src/__test__/rules/firestore.rules.spec.ts
  ● Test suite failed to run

    Jest encountered an unexpected token

    Jest failed to parse a file. This happens e.g. when your code or its dependencies use non-standard JavaScript syntax, or when Jest is not configured to support such syntax.

    Out of the box Jest supports Babel, which will be used to transform your files into valid JS based on your Babel configuration.

    By default "node_modules" folder is ignored by transformers.

    Here's what you can do:
     • If you are trying to use ECMAScript Modules, see https://jestjs.io/docs/ecmascript-modules for how to enable it.
     • If you are trying to use TypeScript, see https://jestjs.io/docs/getting-started#using-typescript
     • To have some of your "node_modules" files transformed, you can specify a custom "transformIgnorePatterns" in your config.
     • If you need a custom transformation specify a "transform" option in your config.
     • If you simply want to mock your non-JS modules (e.g. binary assets) you can stub them out with the "moduleNameMapper" config option.

    You'll find more details and examples of these config options in the docs:
    https://jestjs.io/docs/configuration
    For information about custom transformations, see:
    https://jestjs.io/docs/code-transformation

    Details:

    /Users/takaofunami/src/aid/firesync/fire2pg/functions/node_modules/firebase/compat/database/dist/index.esm.js:1
    ({"Object.<anonymous>":function(module,exports,require,__dirname,__filename,jest){import '@firebase/database-compat';
                                                                                      ^^^^^^

    SyntaxError: Cannot use import statement outside a module

      at Runtime.createScriptFromCode (node_modules/jest-runtime/build/index.js:1728:14)
      at Object.<anonymous> (node_modules/@firebase/rules-unit-testing/dist/index.cjs.js:5:1)

Test Suites: 1 failed, 1 total
Tests:       0 total
Snapshots:   0 total
Time:        0.248 s, estimated 1 s
Ran all test suites related to changed files.
原因の推定
jest-node-exports-resolverのパス推測がよろしくない模様。jest-node-exports-resolveを外して、defaultResolverを使えば、動いた
/** @type {import('ts-jest/dist/types').InitialOptionsTsJest} */

module.exports = {
  testEnvironment: "node",
  moduleNameMapper: {
    "^src/(.*)$": "<rootDir>/src/$1",
    "^@/(.*)$": "<rootDir>/src/$1",
  },
  verbose: true,
  testRegex: "(/__tests__/.*|(\\.|/)(test|spec))\\.[jt]sx?$",
  resolver: "jest-node-exports-resolver",
  modulePaths: ["node_modules"],
};
解決策
特定のモジュールだけ、jest-node-exports-resolverではなくてdefaultResolverにして、解決できた
jest.condif.ts
/** @type {import('ts-jest/dist/types').InitialOptionsTsJest} */

module.exports = {
  testEnvironment: "node",
  moduleNameMapper: {
    "^src/(.*)$": "<rootDir>/src/$1",
    "^@/(.*)$": "<rootDir>/src/$1",
  },
  verbose: true,
  testRegex: "(/__tests__/.*|(\\.|/)(test|spec))\\.[jt]sx?$",
  resolver: "<rootDir>/resolver.js",
  modulePaths: ["node_modules"],
};
resolver.js
const jest_node_exports_resolver = require("jest-node-exports-resolver");

module.exports = (request, options) => {
  if (request.match(/^(@firebase|firebase)\//)) {
    // qconsole.log({ request, options });
    return options.defaultResolver(request, options);
  } else return jest_node_exports_resolver(request, options);
};
e-Tax, eLtaxPCdesk用にwindows10実機を購入した
去年まで、MacのVirtualBox上に、Windows 8.1 入れて、動かしてたのですが、ついに、WIndowsパソコンの購入を決断。 e-Tax,eLtax用なので、windowsも10で十分。 Windowsマシン最後に買ったの、たぶん15年くらい前で事情よくわからず、とりあえず、予算3万円で検索。 Office付きで、新品のを見つけたので、ゴミになる覚悟で、注文。 翌日とどきました。
全くどこのブランドかもよくわからないノーブランドの代物。 見かけはMacbookAir風なのですが、筐体がプラスチックのペラペラで、キーボードもマウスパッドもおもちゃ感はんぱないっす。
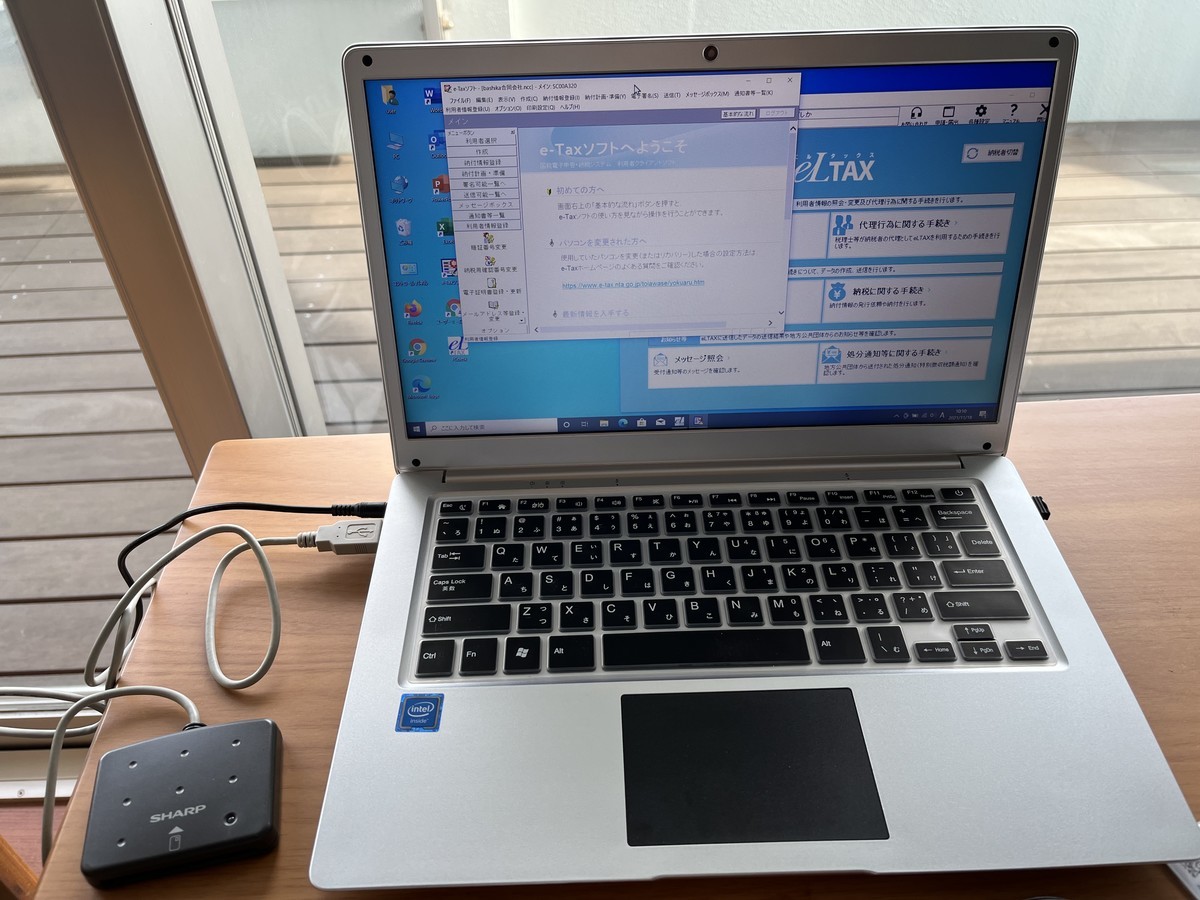
でも、そんな本体でもintelチップ入ってる(たぶん)し、WIndow10は純正(たぶん)なので、etaxには、十分です Office付きにしたので、Excelファイルが普通にみれるのがちょっと、嬉しい
CPUは2016年ごろのチップらしく、以下のページの注意書きが最高です
2020年8月時点においてCeleron N3350は、ノートPC向けCPUとしては最低クラスの性能です。搭載機を使いこなすには、ウィンドウズの高速化チューニングや割り切った運用が必要。PCに詳しくない人は、使わないほうが無難です。
こんなスペックでも動くetaxはある意味すごい。ついでに 2007年ごろ購入した icカードリーダーも繋がった(デバイスインストーラがサポートサイトから削除されてたのだけど、同じこと考える親切な人がちゃんと、コピーをあげてくれてる。ありがたい)

Shopify APIを使う
やりたいこと
Shopifyでオンラインショップ向けのアプリを作りたい
- 外部サイトからオンラインショップへの送客
- ShopifyのAPIを利用できるようにする。
- 実現方法:カスタムアプリの作成
- 管理画面のカスタマイズ
- 入力画面を改良してメタデータを付与できるようにする。例えばフリーワードの description入力した文字列から、特定の文字列(例: "デジタル" ) を抽出して、自動的にタグとする
- 実現方法:カスタムアプリ (Shopify App Bridge)の作成
方法
API自体は、GraphQL版、REST版があるが、商品の検索ができれば、よいので、参照権限が欲しい。 OAuthのトークンが必要
パートナープログラム
この仕組みが素晴らしい。 テスト用のストア作れる。 アプリストアで作ったアプリを販売することもできる。 カスタムアプリとして、特定のクライアント専用のアプリを作ることができる -> shopifyの Billing APIは使えないけど、shopifyに手数料払わなくてもよい?
参照
Shopify App Bridge で埋め込み用のアプリがつくれる shopify.dev
Next.js前提のチュートリアル shopify.dev
チーム作れる help.shopify.com
ストアで販売しないなら、カスタムアプリが適切 shopify.dev
カスタムアプリを作って、導入先のshopifyストア管理者に権限の付与をしてもらうと APIへのアクセストークンが発行できるようになる shopify.dev
- webhookを使えば、商品の発売終了の通知を受け取れる(要確認)
- コラボレーターは、スタッフにカウントされない
https://shopify.dev/graphiql/storefront-graphiql
